Beyond supporting bee and beneficial insect populations, cover crops can reduce your costs for herbicide, insecticide and fertilizer, and improve overall soil health [3]. Many cover crops can be included in a double-crop system or used as animal forage. Cover crops can be integrated into most crop or crop-livestock systems, including no-till, conventional till, rotational no-till and livestock grazing or haying systems. In the CTIC-SARE survey, farmers who plant cover crops identified these top five reasons for doing so (in order): increase soil organic matter, reduce soil erosion, reduce soil compaction, manage weeds and provide a nitrogen source [1].

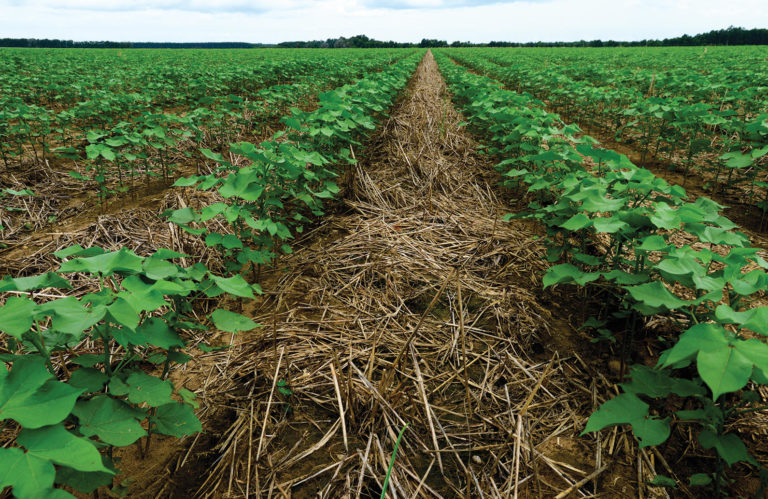
The economic benefits associated with cover crops can be both significant and realized in year one. On a Georgia cotton farm, a grower reduced costs by $200 per acre by implementing conservation tillage and cover cropping. His cover crop cocktail combined crimson clover, an excellent nectar plant and nitrogen source; and rye, a soil-builder and nitrogen scavenger. Between the savings on fertilizer from the clover’s nitrogen enrichment and reduced insecticide costs thanks to beneficial insect activity, this farmer observed that many pests were no longer a problem in his fields [3]. Similarly, a Pennsylvania vegetable farmer cut pesticide costs by 40 percent (saving $125 per acre) by using a combination of cover crops [4], and a North Dakota farmer saw net profits on his barley harvest increase by $109 per acre on cover cropped fields. He was also able to harvest his cover crops as forage for his cattle [5].
There are many tools available to farmers as they weigh the economics of adding cover crops to their system. The USDA Natural Resources Conservation Service’s (NRCS) Cover Crop Economics Decision Support Tool (see Resources) provides a number of cropping system scenarios that explore the costs and benefits of cover crops over time. While some systems, like a soybean/corn rotation in the absence of cost share, only became profitable in the long run, other systems realized a net profit in the first year, such as a cotton/ corn rotation that led to a net profit increase of $38.50 per acre [6]. All of the default scenarios were immediately profitable with a modest cost share.
While a 2005 survey in the Corn Belt found that more than half of all farmers said they would use cover crops if they received cost-share funds [7], the more recent CTIC SARE survey found that farmers are increasingly likely to try cover crops without any sort of financial assistance. This survey found that 63 percent of farmers said they had never received cost-share funds, and only 8 percent restricted their cover cropping to times when they received funding [1]. Although cost-share programs improve the profitability of cover crops, many farmers who use them— perhaps the majority—look beyond the balance sheet when assessing their value. It seems that financial assistance can open the door to cover cropping, but many farmers with experience cover cropping do not require it [1]. The less easily quantified conservation benefits of cover crops, such as their role in soil health and pollinator promotion, are the important consideration for many.
Opportunities to Use Cover Crops
One of the first steps when incorporating cover crops in your system is identifying available niches. You may already have periods in your cropping systems which are open to cover crops. Common niches for cover crops include during the winter fallow, during a summer fallow between cash crops, during a small-grain rotation or during a full year of improved fallow [3]. Cover crops are often used in a corn/soybean rotation, with specialty crops or following small grains [1].

Cover crops sown after the cash crop in the winter fallow niche serve multiple purposes. They both prevent soil erosion and—if they are nitrogen scavengers—can prevent nutrient leaching [3]. Available cover crop niches will vary with the local climate and the cash crops in your rotation. For example, in Minnesota, many growers plant cover crops after corn harvest in September for winter cover [8]. Meanwhile, in North and South Carolina, cover crops are often used to absorb excess nutrients after manure applications [9].
John and Nancy Hayden grow 30 varieties of tree fruit and berries at The Farm Between in Jeffersonville, Vt., and maintain a pollinator sanctuary of perennials, trees and brush piles on their property. Even with such an abundance of flowering plants and habitat, they identified a need for summer cover crops. “We notice in July and August here in the Northeast there’s a dearth of floral resources,” John says. “So for us, it was seeing if we can fill a gap that we can’t with our perennials using annual cover crops.”
The next step in getting the most out of your cover crop is to identify your conservation needs. You may need to break up a plow pan (daikon radish), prevent nutrient leaching (non-legumes, cereals), boost soil fertility with a green manure (legumes), out-compete weeds with a fast-growing plant (buckwheat), provide forage for livestock (crimson clover, canola, cereals), manage nematodes (brassicas), or prevent erosion (cowpea, clovers). Increasingly, farmers are turning to cover crops in “prevented planting” situations—that is, when the soil is too wet to plant in the spring [1].
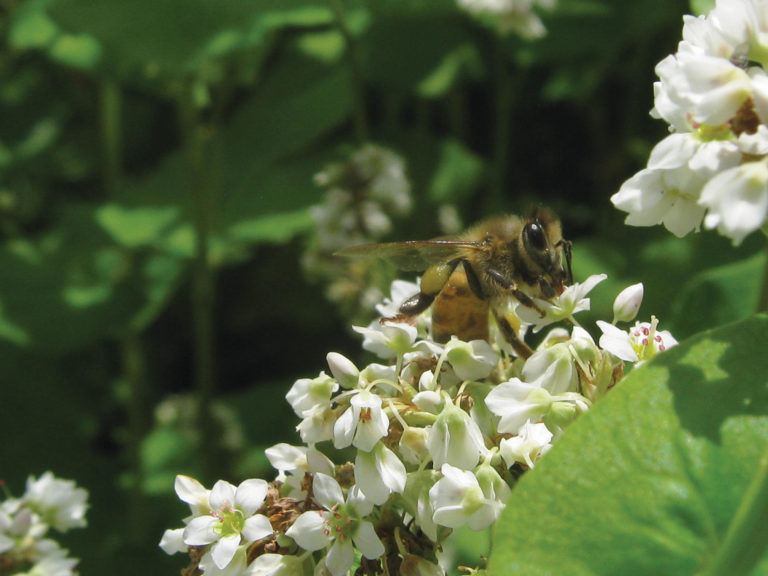
The Haydens used a 2013 SARE grant to evaluate three cover crop options—phacelia, buckwheat and a commercial bee forage mix—for their ability to support bumble bees and suppress weeds in vegetable beds where weed pressure had built up [10]. The phacelia and buckwheat established well, suppressed weeds and attracted pollinators, but the commercial mix was outcompeted by weeds and did not establish well. “The phacelia we liked a lot,” John says. “We were able to see that bumble bees had a statistically significant preference for phacelia over buckwheat.”
Ideally, your cover crop will be dual-purpose. It should both serve as a conservation practice and also boost beneficial insect populations. Your cover crop mixture must include flowering legumes or forbs to accomplish this objective. See Plant Selection for an in-depth discussion of choosing plants for multiple objectives.
Planting and Managing Your Cover Crops
Cover crops can either be sown after harvest of a cash crop, or they can be sown into a standing crop (over-seeding). Typically, drilling uses fewer seeds than broadcast seeding and promotes more uniform stand establishment. It can be done post-harvest or into a standing crop, and is the technique most commonly used by farmers in the CTIC-SARE survey [1]. Other farmers aerially overseed cover crops into a standing crop. Over-seeding is most commonly used to give cover crops a head start before the winter in regions with a short growing season. The CTIC-SARE survey found that the median seed cost in the Midwest was $25 per acre in 2013 [1].
As you decide when to terminate your cover crop, the goal is to do so sufficiently in advance of your cash crop for cover crops to decompose, release nutrients and recharge soil moisture [11, 12]. You need to weigh these demands against the need to minimize the amount of time your fields are bare. Appropriate termination time for cover crops varies by region.
At the time of this writing, federal crop insurance programs have developed region-specific requirements for cover crop termination. These rules are intended to reduce yield losses of cash crops due to water use by previously planted cover crops. They require the termination of cover crops in advance of cash crop planting, from at least 35 days before planting to up to five days after planting, depending on the region. For more information, see Balancing Insect Conservation with USDA Crop Insurance Rules.
Cover crops can be terminated by mowing, tillage, herbicides, harvesting, rolling or winter kill. An herbicide burn down is the most common termination strategy, followed by tillage and winter kill [1]. You may also opt to graze or hay your cover crop for winter forage. The best option will vary depending on plant selection and growth stage. Deep tillage should be avoided, as it tends to counteract many of the benefits provided by cover crops. These range from improved soil tilth to increased populations of over-wintering beneficial insects.
If pollinators are to benefit from your cover crop planting, you must give it time to flower. This is not a problem for management of legumes or brassicas. Their conservation benefits are maximized after they bloom. Management of some other plantings can be a little trickier, as is the case for buckwheat. Buckwheat must flower for a minimum of 20 days to build up beneficial insect populations [3]. At the same time, buckwheat should be mowed seven to 10 days after flowering to prevent it from reseeding [3]. Because buckwheat is one of the best cover crops for bees and beneficial insects, and because it kills so easily with mowing, it may be advisable to put off cover crop termination until beneficial insects are established, with the expectation of having to mow a field twice to achieve cover crop termination. Note, however, that this practice could result in unwanted buckwheat (weeds) in subsequent crops. Alternatively, a farmer could stagger planting and mowing row by row to lengthen the bloom period while still preventing buckwheat from reseeding.
When the Haydens used buckwheat as a summer cover crop, they allowed it to flower extensively and go to seed, and did not follow it with a fall crop. With unfavorable conditions for germinating through the fall and winter, volunteer buckwheat was not a problem come spring. “From our experience, reseeding would only be a problem if you were planting another crop the same season,” John Hayden says. “Neither phacelia nor buckwheat presented any problems with volunteers the year after planting.”
Another cover crop practice that may require some additional tweaking to benefit bees and beneficial insects is planting for green manure. Green manure is tilled into the soil to increase soil organic matter in the vegetative stage or at flowering. This practice can be made more insect-friendly by allowing the green manure crop to flower for a few days before tilling, but still tilling before seed set.
