Eric Mader, Pollinator Outreach Coordinator, the Xerces Society for Invertebrate Conservation
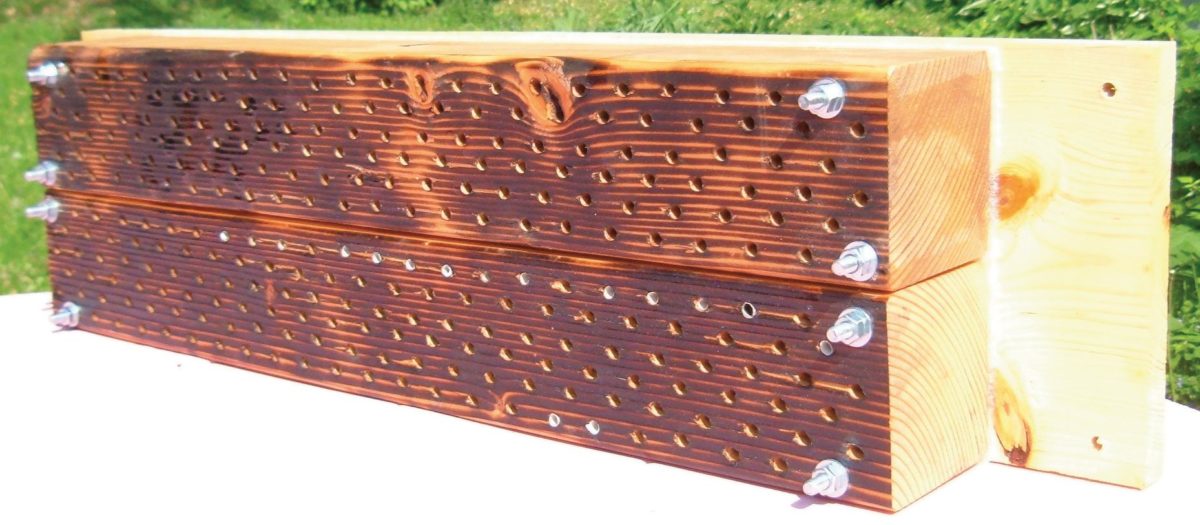
Hybrid nest blocks combine the attributes of both solid board nests and the loose-cell management system (Figure E.1). Such systems use removable paper inserts for nest liners to facilitate annual nest block cleaning. This is essential to remove disease spores such as chalkbrood and parasites like the hairy-fingered mite. These types of drilled wooden blocks are much more secure and durable than mass-produced plastic and Styrofoam nests. Upon removal, the nest liners can be placed into cold storage and incubated in the same way that loose cells are managed.
Variations of this design are widely used by various leafcutter and mason beekeepers. This particular design uses a compressed foam backing material to prevent the entry of parasites such as chalcid wasps.
Paper nest tubes are custom manufactured by several producers, or as demonstrated here, can be made by rolling precut pieces of paper around a dowel. If paper tubes are not used, some sort of phaseout system should be employed to prevent bees from re-nesting in boards continually without cleaning.
Inter-hole distances should be greater than 1⁄2 inch (12.7 millimeters). This distance will result in easier orientation for bees that are returning from foraging. Bees that can easily find their nest hole will complete nests more quickly, and are less likely to enter the wrong nest holes where they could become contaminated with disease spores or parasites. Many commercially available nests tend to have higher hole densities, which can be problematic.
Any of the attributes demonstrated here can be modified, depending on the species being managed. However, the goal should be to configure nest dimensions that promote bee health, maximize female production, and facilitate ease of orientation.
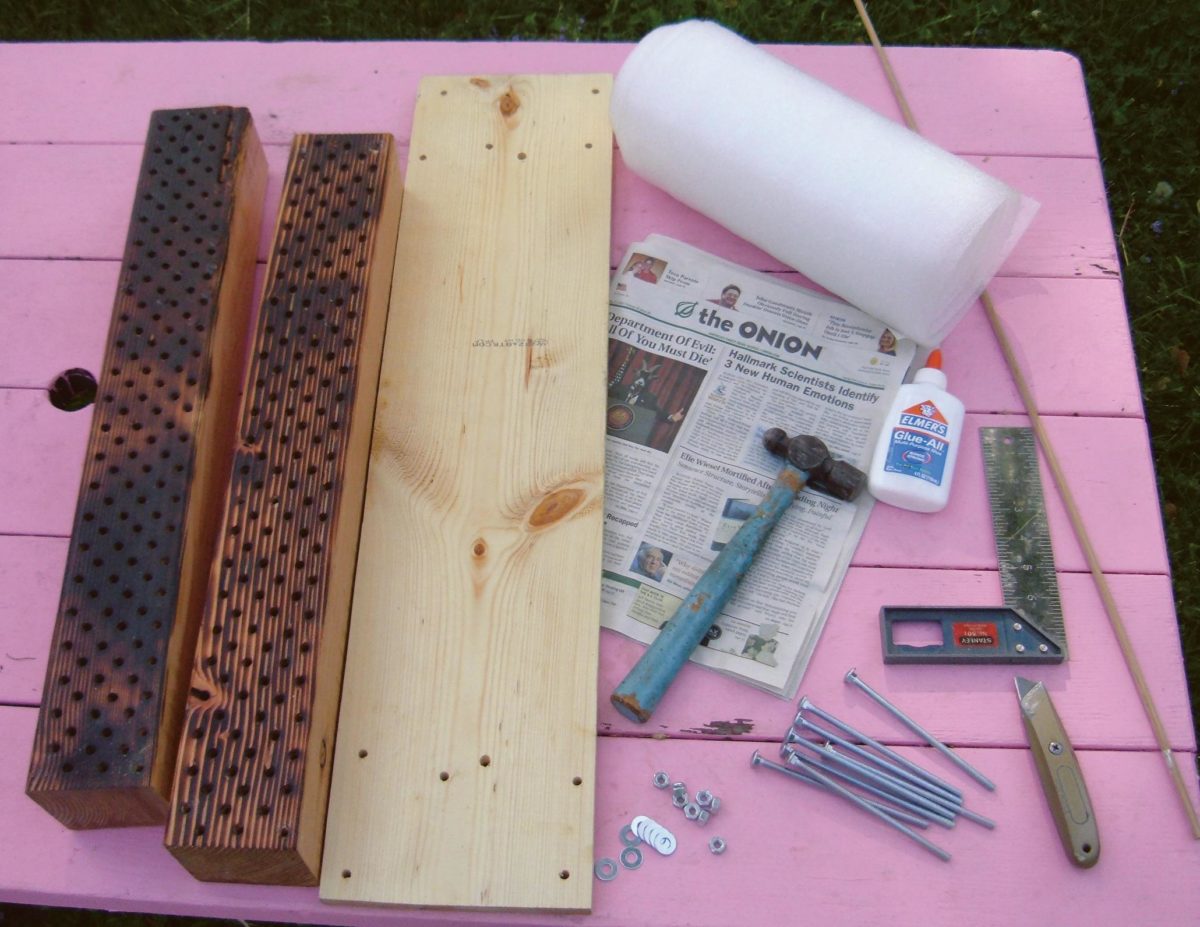
Materials (figure E.2)
- Untreated pine or fir posts, cut to desired length
- Pine or plywood backing board
- Closed-cell packing foam
- Carriage bolts, washers, nuts
- Various tools (drill, saw, hammer, wrench, utility knife, square, propane torch)
For Paper Liners (Optional)
- Dowel or metal rod (slightly smaller than the nest hole diameter)
- Glue
- Paper (newspaper or cooking-type parchment paper)
Nest Block Construction
Untreated 4-inch (10.2-centimeter) fir posts are fine for leafcutter bees. Larger mason bees, such as blue orchard bees and hornfaced bees, require deeper 6-inch (15.2-centimeter) cavities for optimal sex ratios.
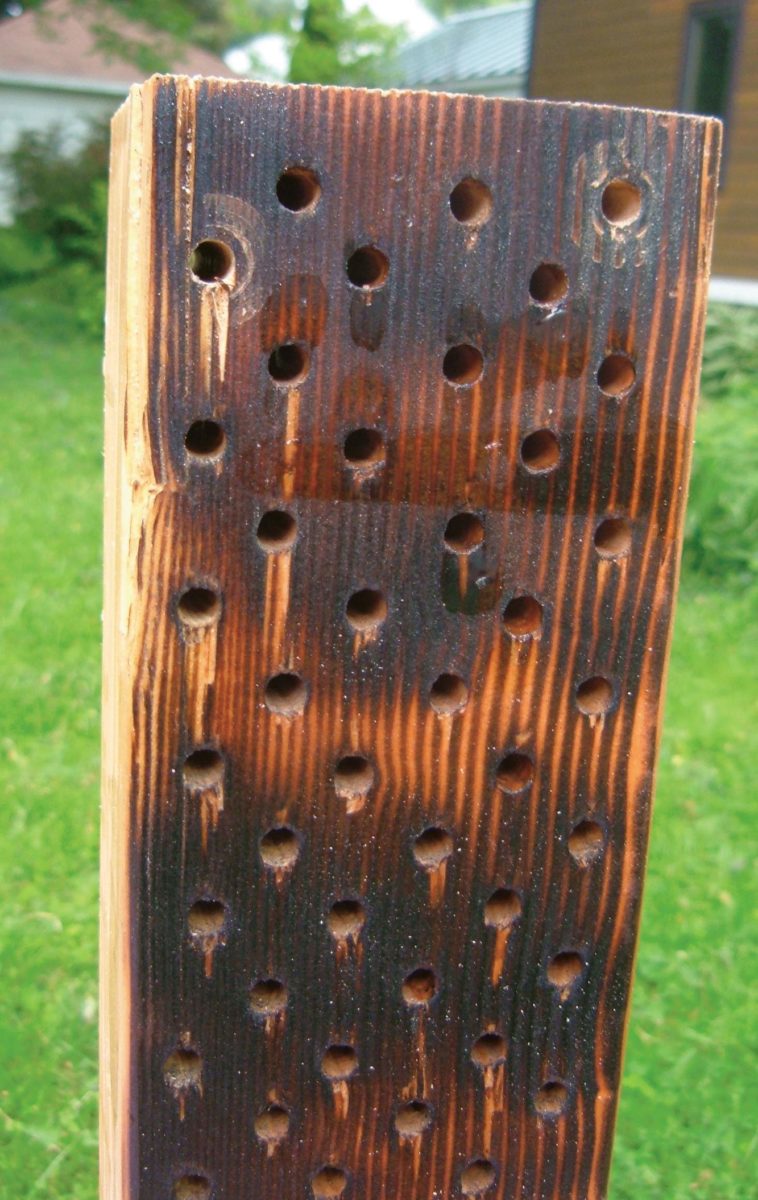
Holes are spaced at least 1⁄2 inch (1.3 centimeters) apart to reduce search time for nesting bees. Holes can be marked in advance with a pencil and ruler, then started on a drill press. Since most drill presses have a plunge depth less than 3 inches (7.6 centimeters), holes may need to be finished with a hand drill. Brad point drill bits provide the smoothest cut. A backing board should also be used when drilling all the way through to prevent splitting.
Optimal hole diameters are 1⁄4 inch (6.4 millimeters) for alfalfa leafcutter bees, and 5/16 inch (7.9 millimeters) for blue orchard bees. Holes should be drilled slightly larger if paper inserts are to be used.
After drilling, nest blocks are lightly sanded to remove burs. Then the front is scorched with a propane torch (Figure E.3). After scorching, the block is treated with water-based polyurethane, and the holes are redrilled. Alternately, the nest can be painted in dark contrasting colors such as blue and black; however, some paint finishes tend to be less attractive to bees. Anecdotal evidence suggests that dark colors such as blue and black are most attractive to some cavity-nesting bees.
Backing Materials
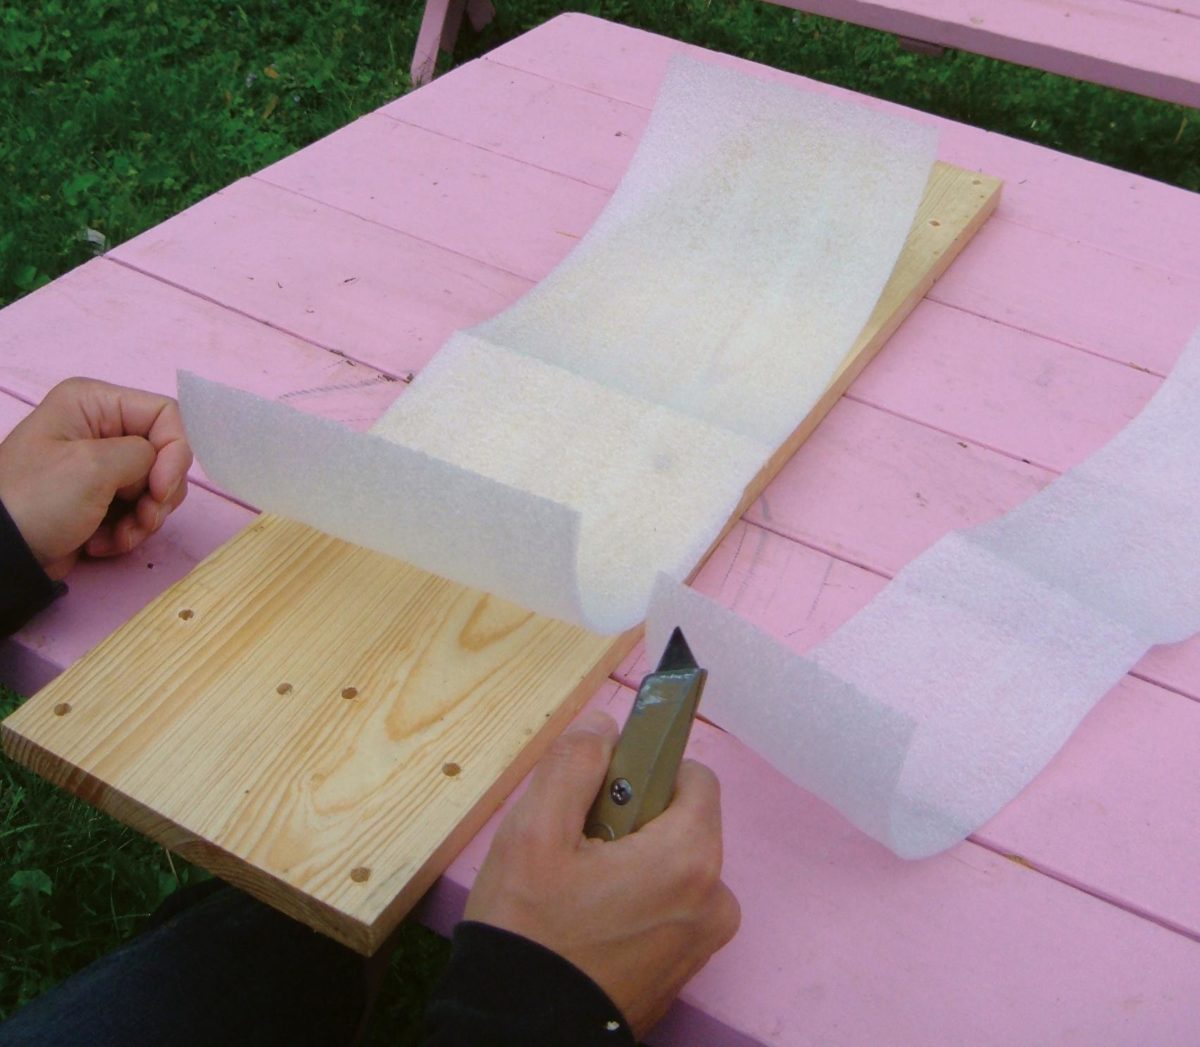
A pine or plywood backing board is cut to length, and holes are drilled that correspond to the outer holes on the nest block.
Next a sheet of closed-cell packing foam is trimmed to the size of the backing board. Only closed-cell foam should be used, since it does not absorb water. This type of foam is available from office supply stores (Figure E.4).
Assembly
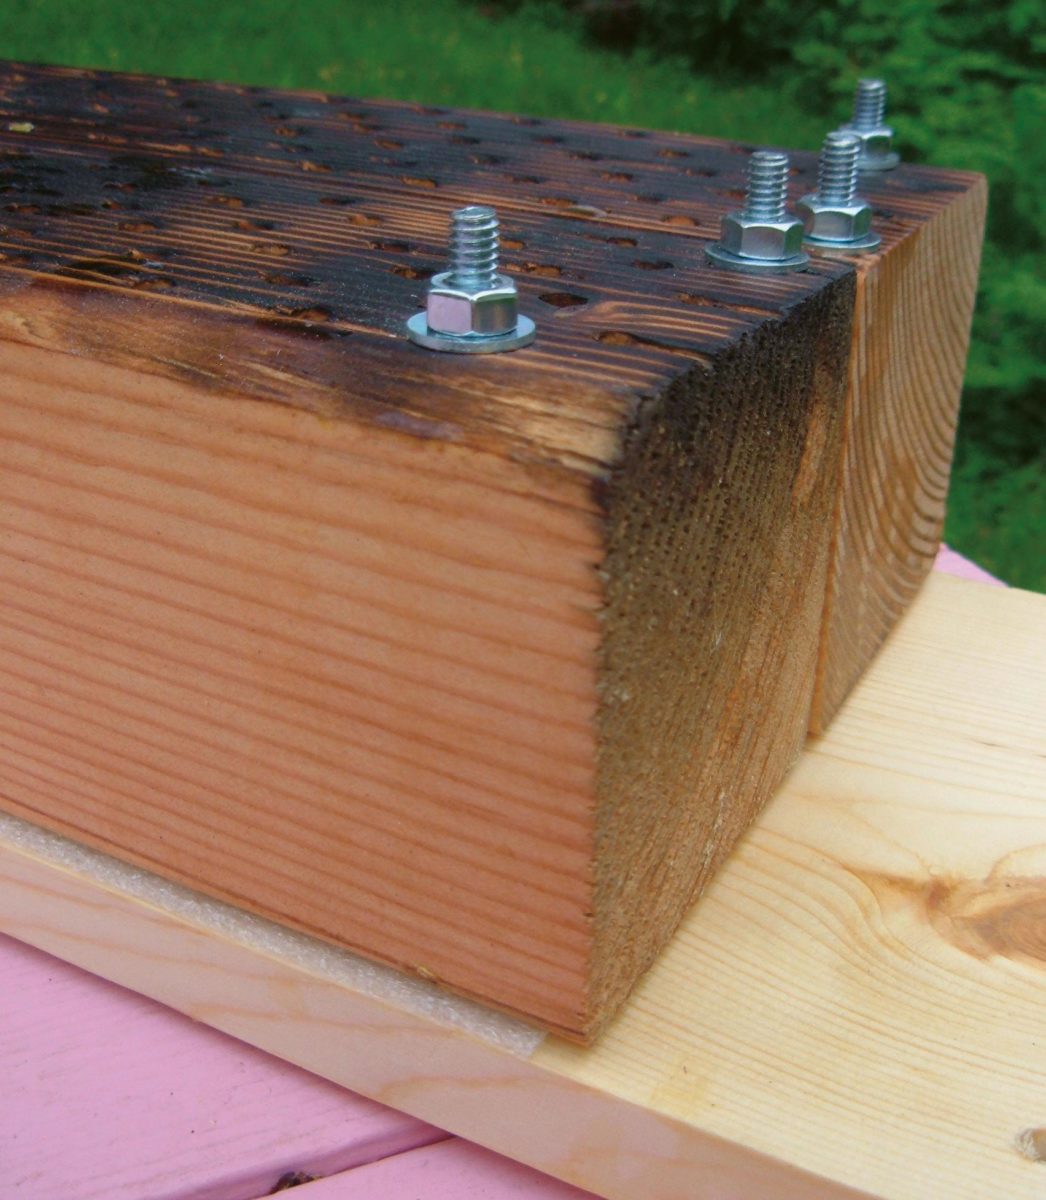
Carriage bolts are inserted through the backing board, foam, and nest block. A hammer may be needed to help seat the bolts the first time the nest is assembled. The bolts are then secured with washers and nuts (Figure E.5). By tightening the nuts, the backing foam is compressed, creating a seal that reduces chalcid wasp parasitism. Nesting bees may remove the small exposed circle of foam in the back of the nest cavity; however, the outer seal will remain intact.
Paper Tube Liners
The use of paper tube liners may reduce the incidence of chalkbrood infections.
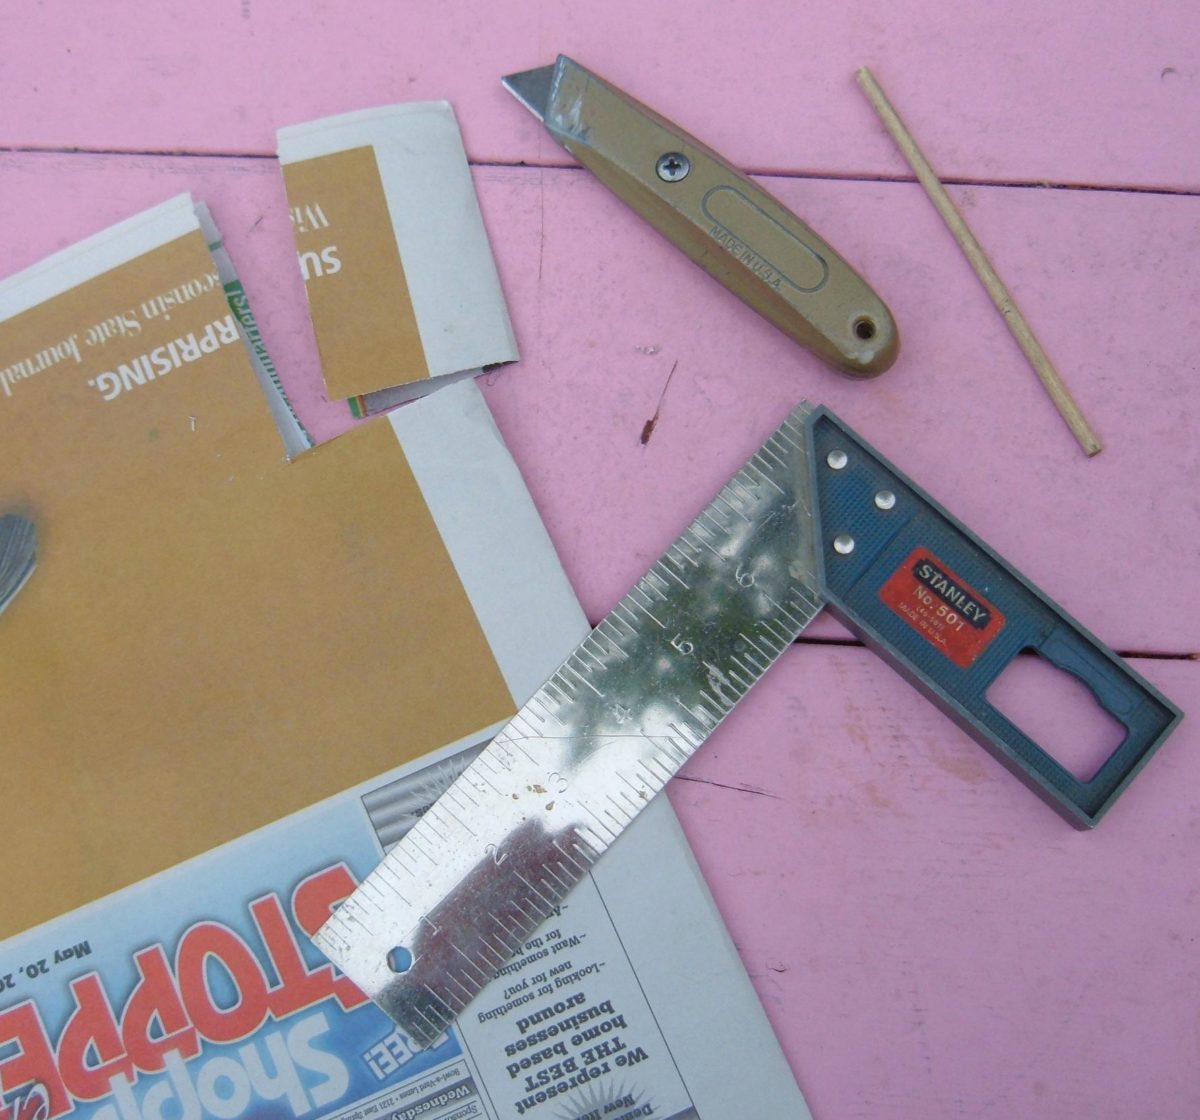
Paper tubes can be custom manufactured for this purpose from several commercial vendors, or they can be homemade. Trial and error will determine the exact size paper needed for your application. Once determined, stacked sheets of paper can be trimmed to size using a utility knife (Figure E.6).
Paper Tube Assembly
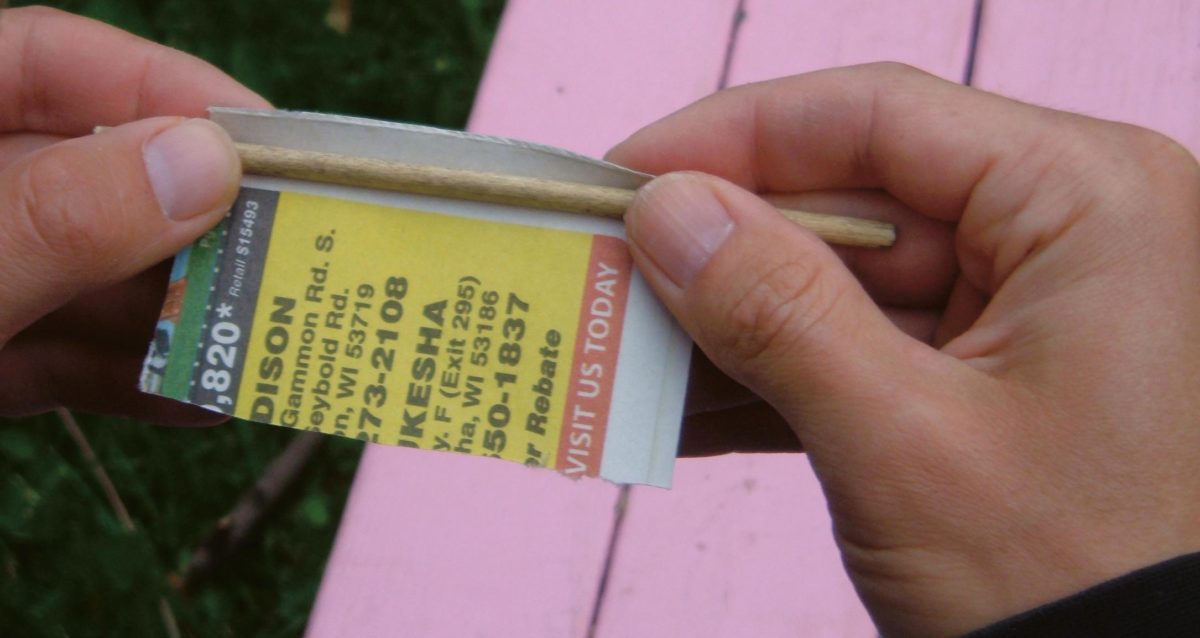
The trimmed paper is wrapped around a dowel or metal rod slightly smaller than the nest block holes (Figure E.7). A small drop of glue is added before rolling the paper around the dowel. After rolling the tube, the paper is secured with a thin line of glue, then compressed for several seconds.
Paper Liner Insertion
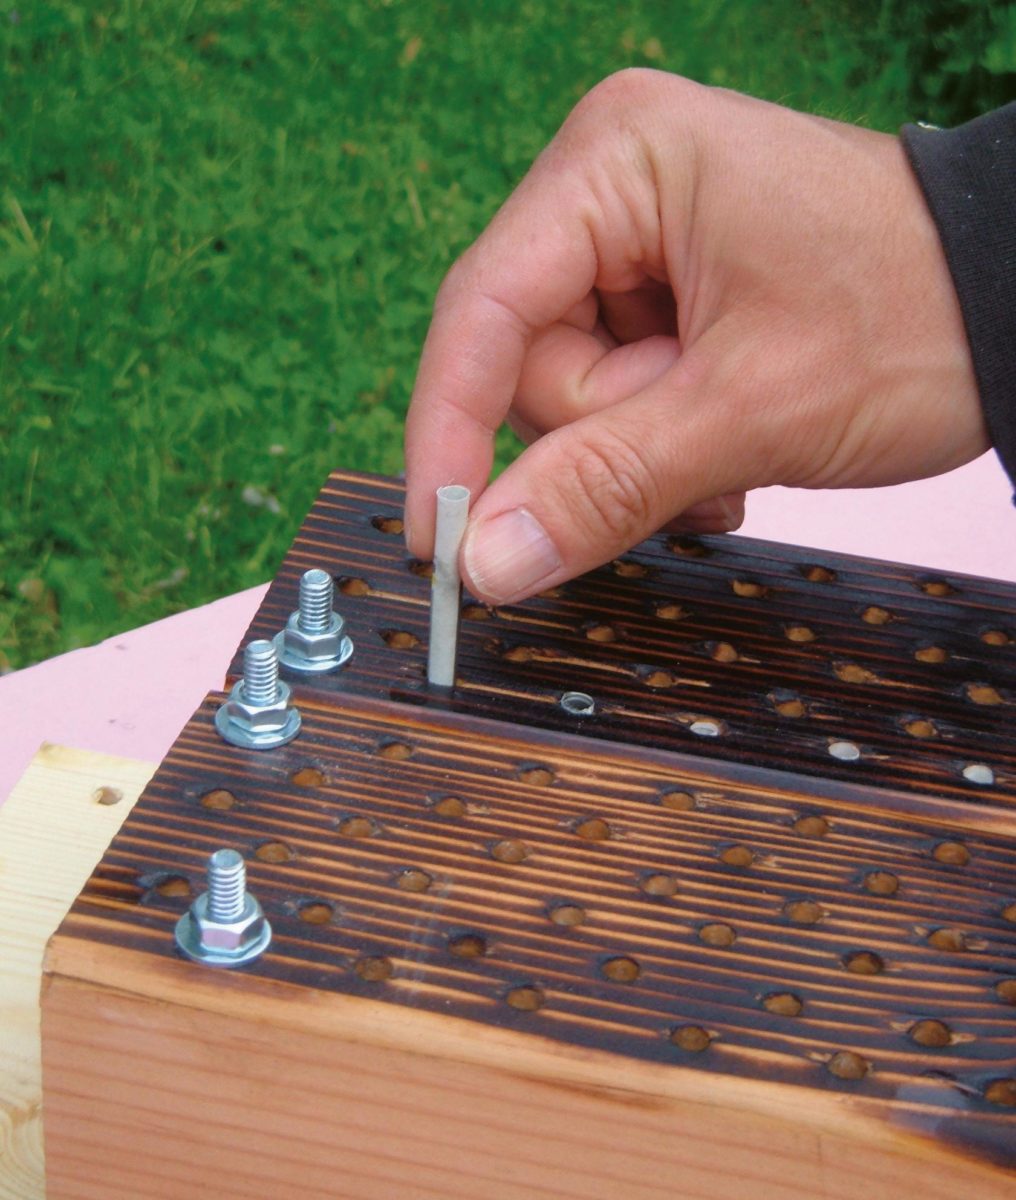
After the glue has dried, the paper tubes can be inserted into the nest block. It is important that the liner fit tightly within the nest cavity (Figure E.8). Any excess space between the liner and nest block can allow movement by parasites.
At the end of the season, the entire nest is disassembled. The foam backing should be discarded, and the paper inserts are carefully removed with tweezers or forceps, or pried out with a small, sharp-pointed awl. The nest block and backing board are then disinfected with a bleach-water solution. The intact paper liners with bees should be stored in a secure location, or placed in cold storage.

Figure E.5 Nuts, washers, bolts, drilled block, backing material, and backing board in nest block. Photo by Eric Mader. 
Figure E.6 Materials and tools needed to make paper tube liners. Photo by Eric Mader. 
Figure E.7 Paper being wrapped around a wooden dowel to make a paper tube liner. Photo by Eric Mader. 
Figure E.8 Paper tube liner being inserted into nest block. Photo by Eric Mader.
